Setting Your LinkedIn Freelance Writer's Profile Up For Succes - Highlighting Your Skills
In the following recent posts, I went through how to set up the main sections of your LinkedIn writer's profile so you can maximise the chances someone will shoulder tap you for writing gigs.
- How to set up the Introduction section of your LinkedIn profile as a writer
- How to maximise your LinkedIn About and Experience sections
- Getting your Featured and Services sections set up
In this post I'm going to explain how to highlight your skills so they catch the eye of anyone searching for someone with your capabilities.
Let's start by looking at your Skills section.
Skills
It seems a bit obvious that the Skills section is all about ... surprise! ... your skills.
But if you look closer at the skills that are listed for you, do they all fit your current role as a freelance writer?
Or do they have skills you collected back when you were just out of university and in your first job. And they don't do your current skills justice?
Take my listed skills, for example.
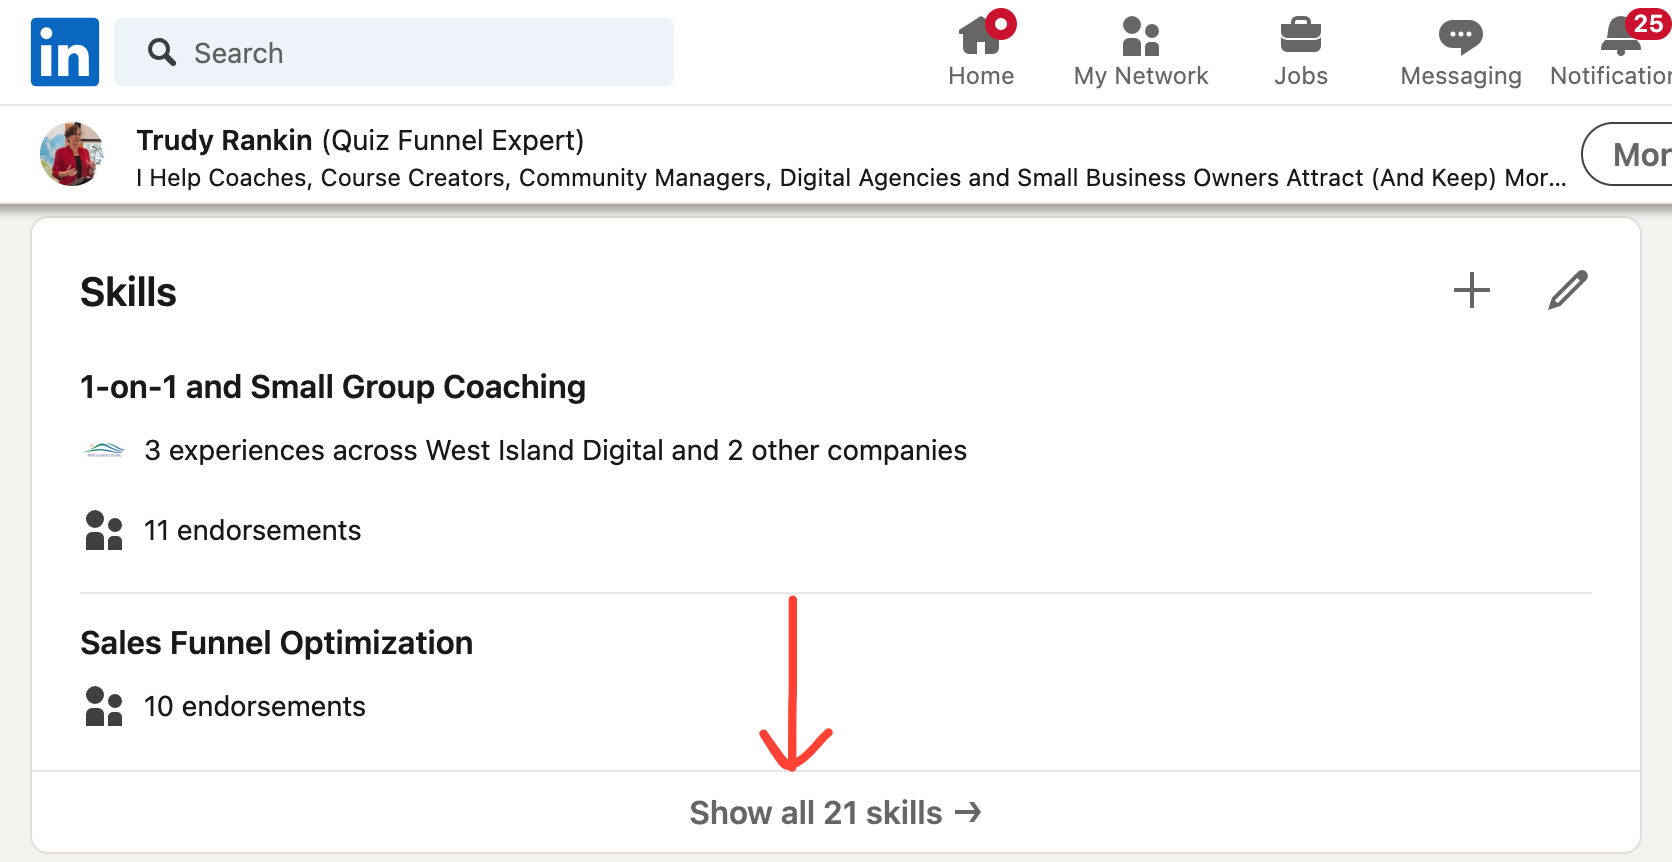
LinkedIn tells me I have 21+ skills, including skills for the public sector and governance ... roles that I gave away years ago. So I have no desire to promote those skills and likely will never want to do so again.
Instead I want to highlight the skills that I use right now to help my online business clients get more leads and make more money, all without burning themselves out or hiring a big team.
And it will probably be the same with you.
The trick is to add in the skills that you want to be known for in your particular freelance writing niche. Then get people to endorse you for those skills. What's nice is that you can use endorsements from previous roles you've held, as long as they are relevant to what you want to be know for now.
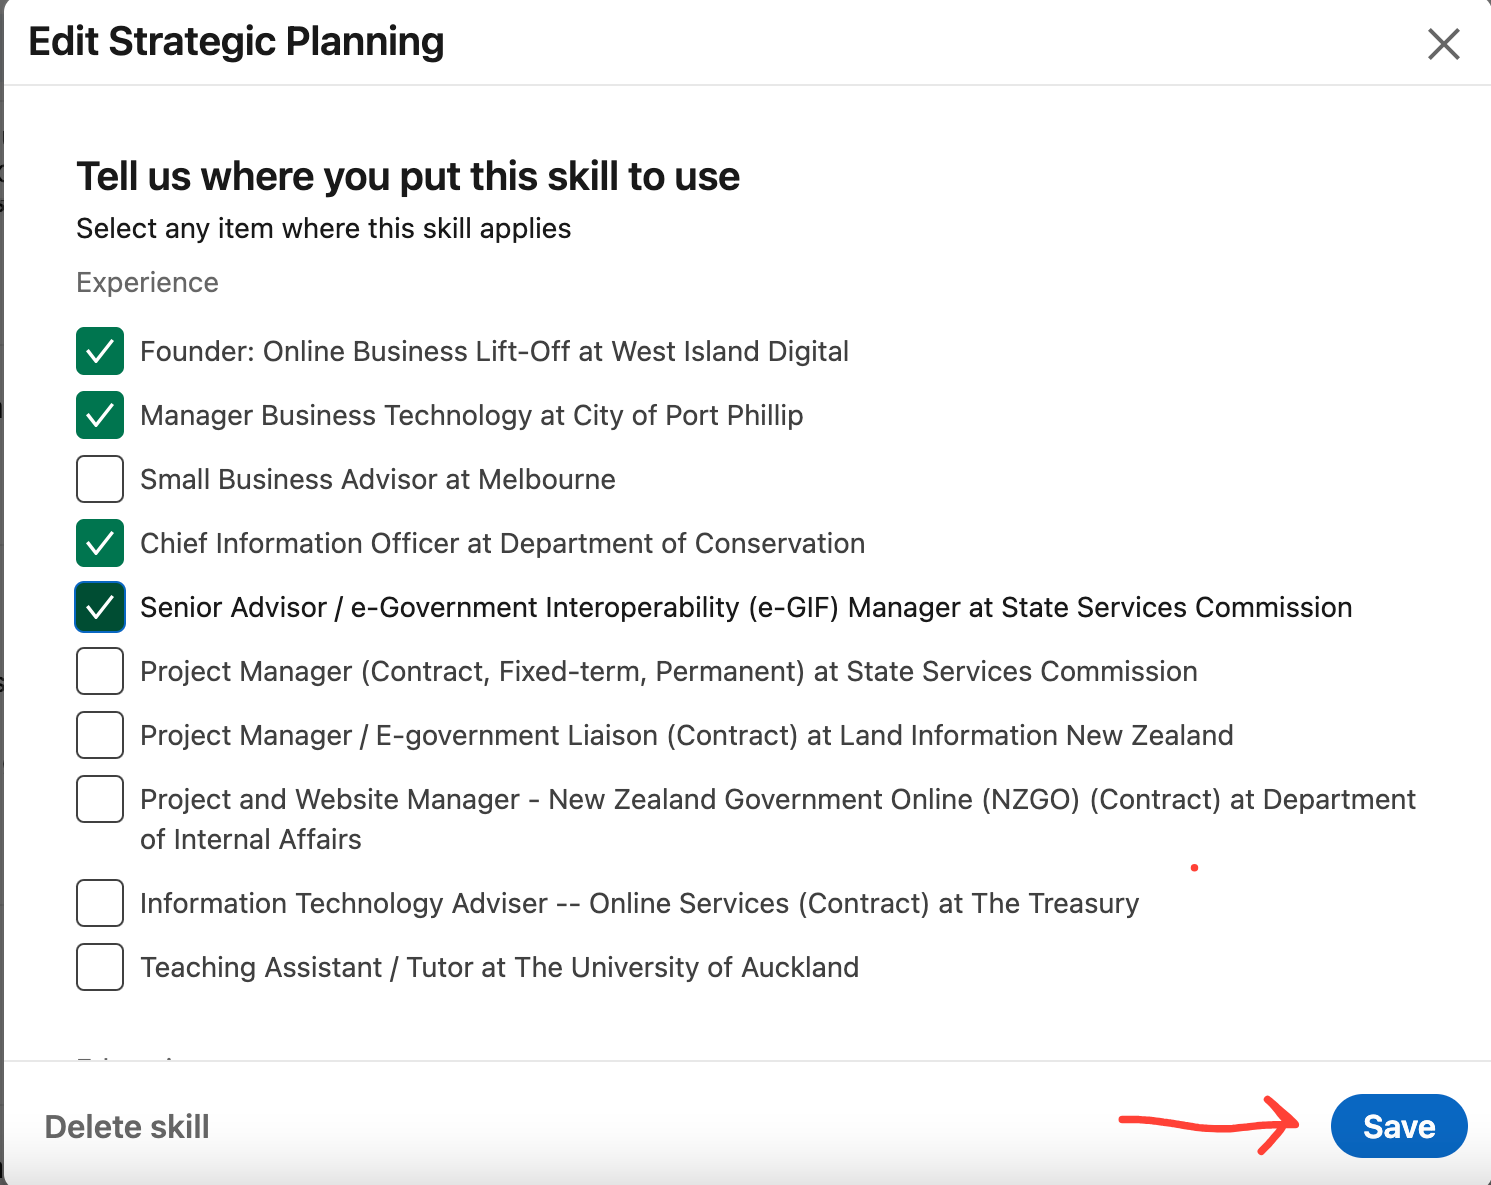
You can do this by choosing the relevant skill, then clicking on the little pencil icon in the upper right hand corner (see my "Strategic Planning" skill example below).

You'll then see a screen that shows all the roles you've previously held in any of your old jobs or roles (assuming that you've included them in your LinkedIn profile).
These old roles will show up in that particular skill section, particularly if someone who knew you while you were working in that role has endorsed you for that skill.
Choose all the old jobs/roles that are relevant and then click on the "Save" button in the lower right hand corner.
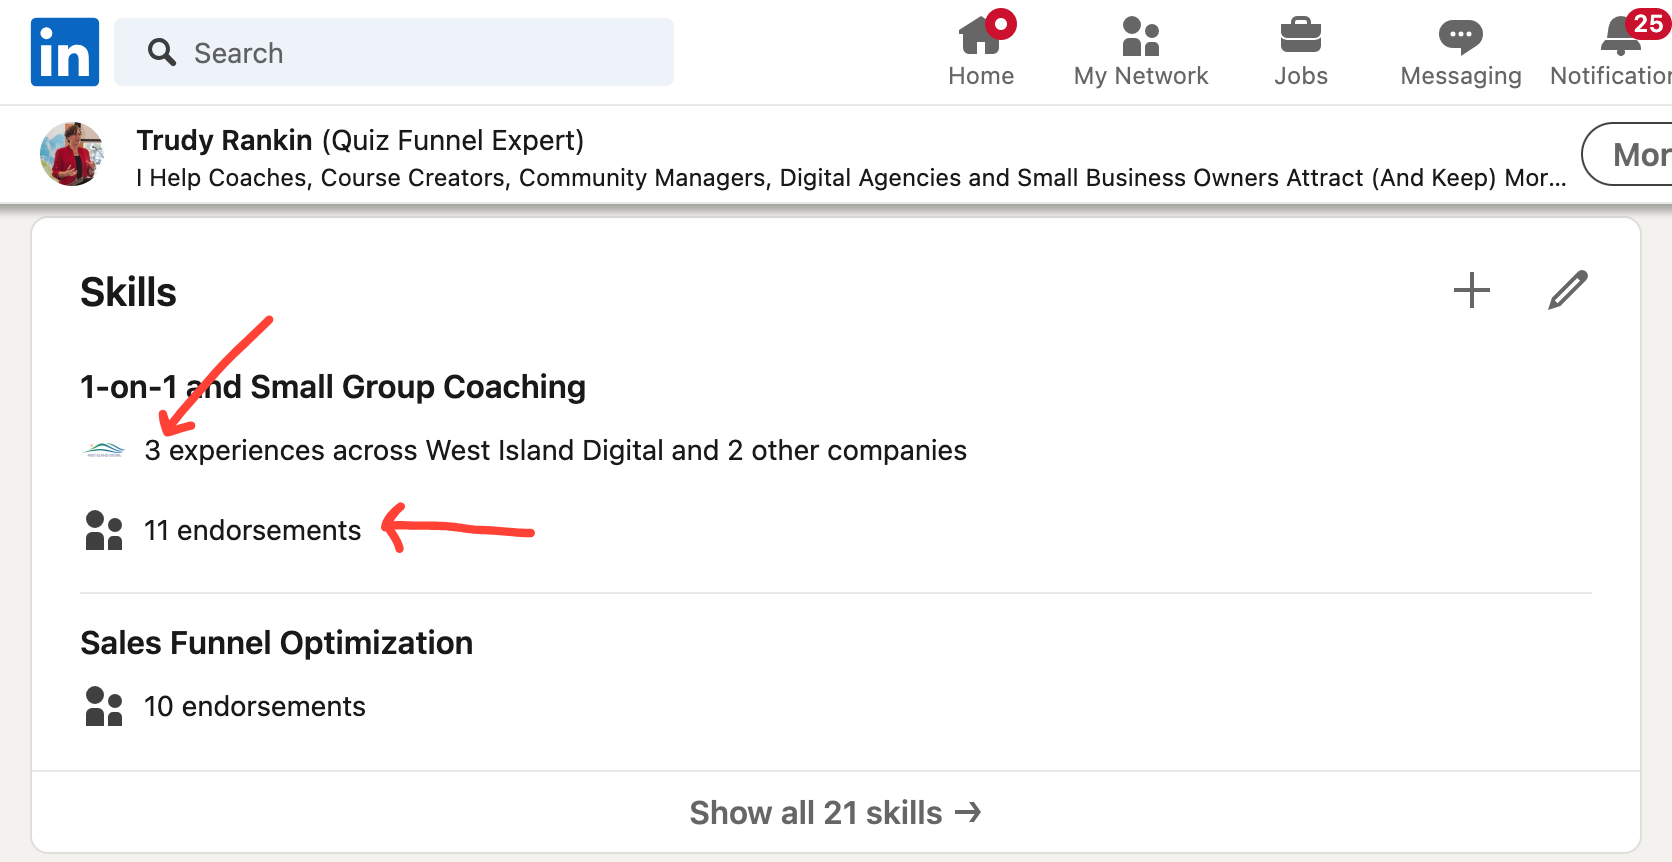
Your skills section will now look like this ...
Of course, you can always delete any skill that you no longer think is relevant. But I think it's preferable to simply not make that skill visible. If you delete it, all those endorsements are going to disappear. And you never know ... you might want those endorsements back one day.
So how do you make a skill "not visible"?
You click on the 3 little dots in the upper right hand corner of the skills section and a little drop-down box will appear.
Then click on "Reorder" to change the order in which your skills show up. Put the ones you want to be visible right up at the top and move the others lower down. Typically you can see 2 (sometimes 3) of the skills you have listed. So choose the ones you put at the top of your list very carefully.

The key takeaway here is that you can list as many skills as you like, but I recommend listing the specific skills that highlight the different types of writing and different industries that you write for.
Getting Your Skills Endorsed By Others
If you want to have others believe you when you say you have specific skills, you need to have other people endorse you. In other words, specifically use LinkedIn's "endorse" feature to say that they can vouch for you and the skills you say you have.
You can reach out to your list of connections and ask them to endorse you. Or you can reach out to 2nd or 3rd level connections. If you're not connected in any way to someone who could legitimately endorse you, reach out and ask them to connect with you first.
When you do reach out and ask for an endorsement, you can either specify a specific skill or ask them to choose the ones they believe you are strongest in. It can be quite enlightening to see which ones they pick!
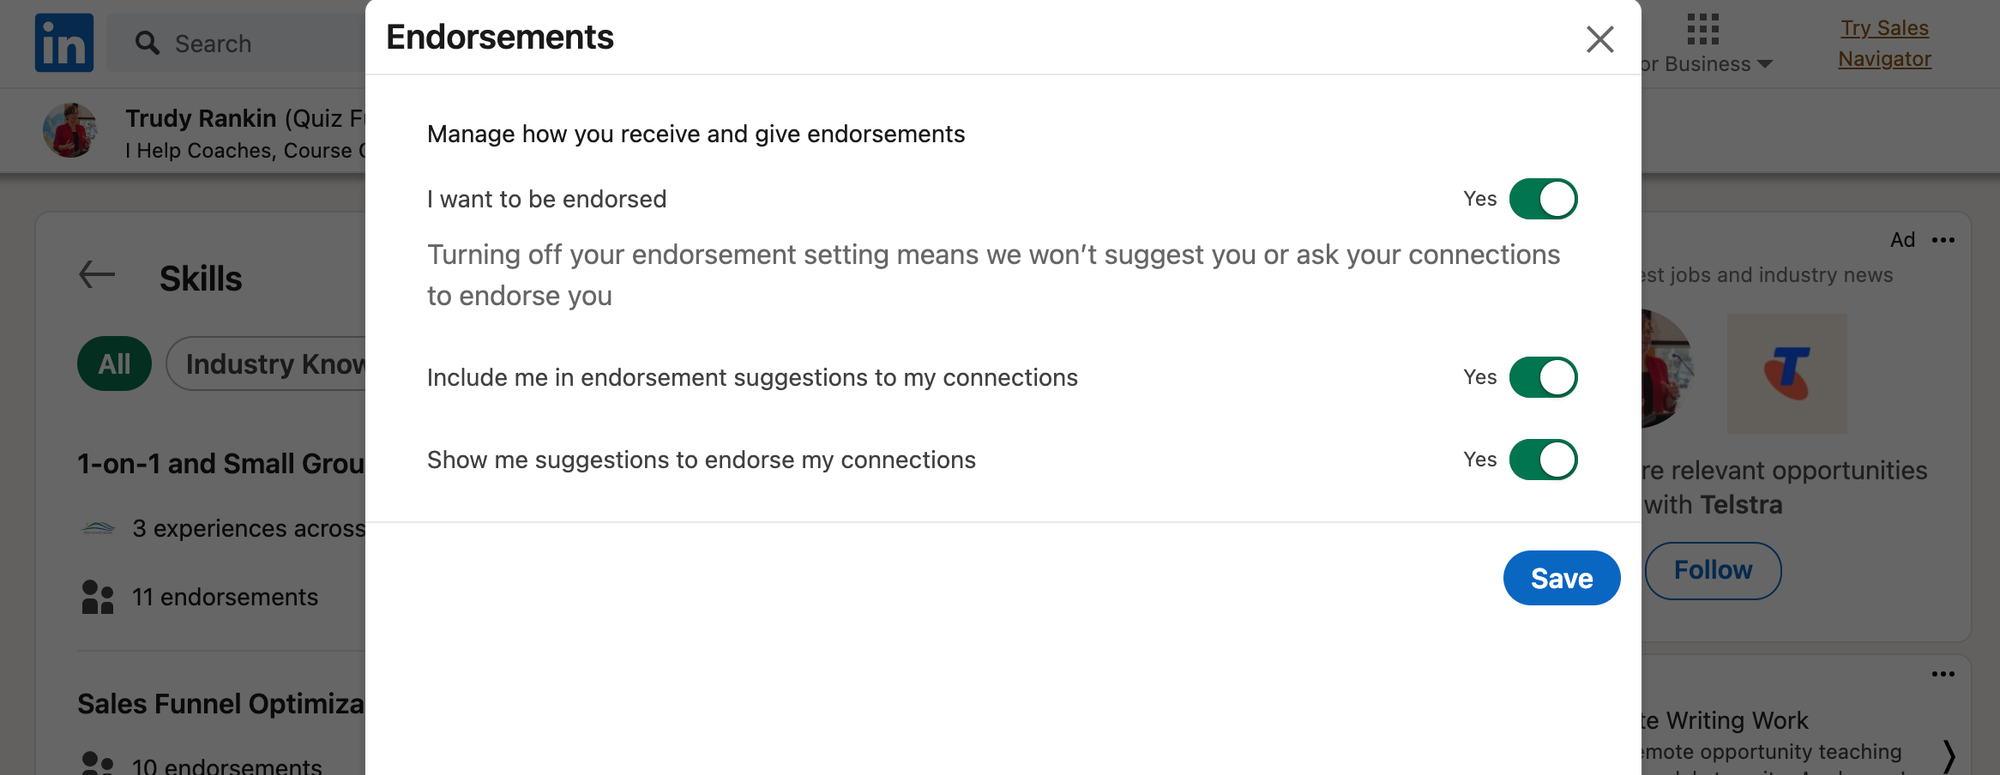
Before you ask for endorsements, though, you'll want to make sure your "endorsement" settings are set up.
Go to your "Skills" section, then click on words at the bottom that say how many total skills you have.

Then click on the three little dots in the upper right hand corner and click on the "Endorsement settings".

You'll get this dropdown box. Make sure you've said "Yes" where it says "I want to be endorsed". And I recommend that you turn all the little sliders on the right hand side to "Yes" as well. If you do, LinkedIn's built in "smarts" will kick in over time and automate some of the effort of asking for endorsements.
And there we have it.
Your skills section is very important for highlighting what you can do and for proving you've got what it takes to successfully take on freelance writing jobs and gigs.
Remember:
Recommendations AND endorsements are like gold when it comes to helping convince someone you're the right writer for them. So always, always ask for a recommendation AND an endorsement when you've completed work for a client.
If you're like most people, asking will feel awkward at first. So have a listen to How To Get Client Testimonials Without Having To Beg for tips on getting clients to say nice things about you ... in public ... without being embarrassed.
This article is brought to you by:

Taking Action
- It's time to decide which skills you want to be known for. Sit down, make a list and then check to see if they are already in your LinkedIn profile
- Add in any skills that are on your list, but not in your profile
- Schedule time in your calendar to regularly reach out to your connections and ask them to (honestly) endorse you for the skills you've got on your profile.
Resources
And as always, a reminder that Canva (affiliate link) is a brilliant tool for creating these banners and makes it super easy to experiment with different styles, fonts and layout. Their free account has all the functionality you need and it's user-friendly.


Member discussion